
How to Adjust Valve Clearance on a Clone Engine
Step-by-step valve lash adjustment for Predator 212, Honda GX, Tillotson, and other clone engines. Cold engine, TDC, feeler gauges, and lock-nut tips.
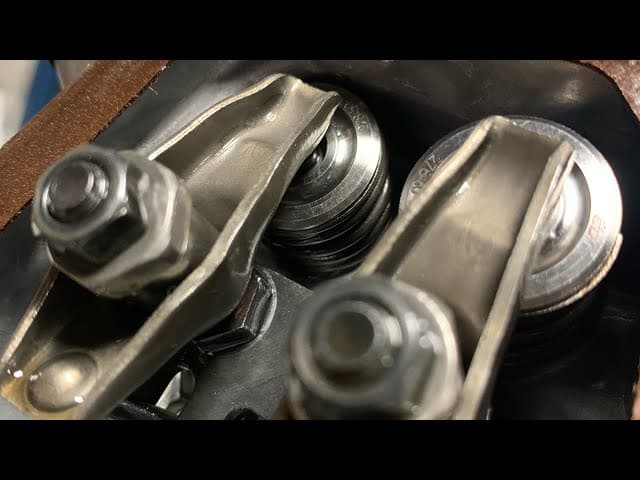
Adjusting valve clearance (lash) on a clone engine is routine maintenance, not a mystery. Predator 212, Honda GX, Tillotson, and the rest of the clone family all follow the same basic process. Do it cold, find true top dead center on the compression stroke, set the gap with a feeler gauge, and lock the nut without moving the screw.
You will need metric or imperial feeler gauges, a 10mm or 14mm wrench depending on the model, and a flathead screwdriver or small specialty wrench for the rocker adjuster.
1. Preparation
Work cold. Always adjust valves when the engine is completely cold. Hot metal expands and the clearances change, so a hot adjustment will be wrong once it cools.
Disconnect the spark plug, remove the valve cover bolts, and take the cover off. Replace the gasket if it is torn or brittle. A crushed or leaking gasket is not worth saving.
2. Find TDC on the compression stroke
Leave the spark plug out. That releases compression so you can turn the flywheel by hand without fighting the engine.
Find the piston's highest point. Drop a long, thin screwdriver or a straw into the spark plug hole so it rests on top of the piston. Rotate the flywheel slowly by hand until that tool reaches its absolute highest point. That is top dead center (TDC).
Verify you are on the compression stroke. Both rocker arms should have a little wiggle or play if you are right. If the rockers are tight or pushing down, you are on the wrong stroke. Rotate the flywheel one full turn (360 degrees) and find TDC again.
3. Measure and adjust clearance
Identify the valves. The intake valve sits on the side closest to the carburetor. The exhaust valve is near the muffler or exhaust port.
Check the spec for your engine. Standard clone engine specs generally call for an intake gap of 0.05 mm to 0.08 mm (0.002 to 0.003 inches) and an exhaust gap of 0.05 mm to 0.08 mm (0.002 to 0.003 inches). Always confirm against your engine manual or aftermarket camshaft card. Some exhaust valves specify up to 0.15 mm (0.006 inches).
Set the gap. Loosen the lock nut on the rocker arm. Slide the correct feeler gauge between the valve stem (or lash cap) and the rocker arm. Turn the adjusting screw until you feel a slight drag on the gauge when you pull it back and forth. That slight drag is the target, not a hard bind.
Lock it down. Hold the adjusting screw perfectly still with a screwdriver or small wrench, then tighten the lock nut. If the screw turns while you snug the nut, you just threw the setting away.
4. Final verification
Double check. Put the feeler gauge back in after the lock nut is tight. Make sure the adjustment did not shift. The correct gauge should slide with slight tension. The next size up should not fit.
Reinstall the valve cover with the gasket seated correctly. Torque the bolts evenly so you do not warp the cover or crush one corner of the gasket.
Why this matters on a race weekend
Loose valves clatter and steal power. Tight valves can hang open, burn seats, and put an engine on the trailer. A few minutes with a feeler gauge is cheaper than either outcome.
More on the engines we run and teach around at Music City Kartplex: the Learn hub. Questions at the counter are always fair game on race day.
Jeff
Owner, Music City Kartplex